


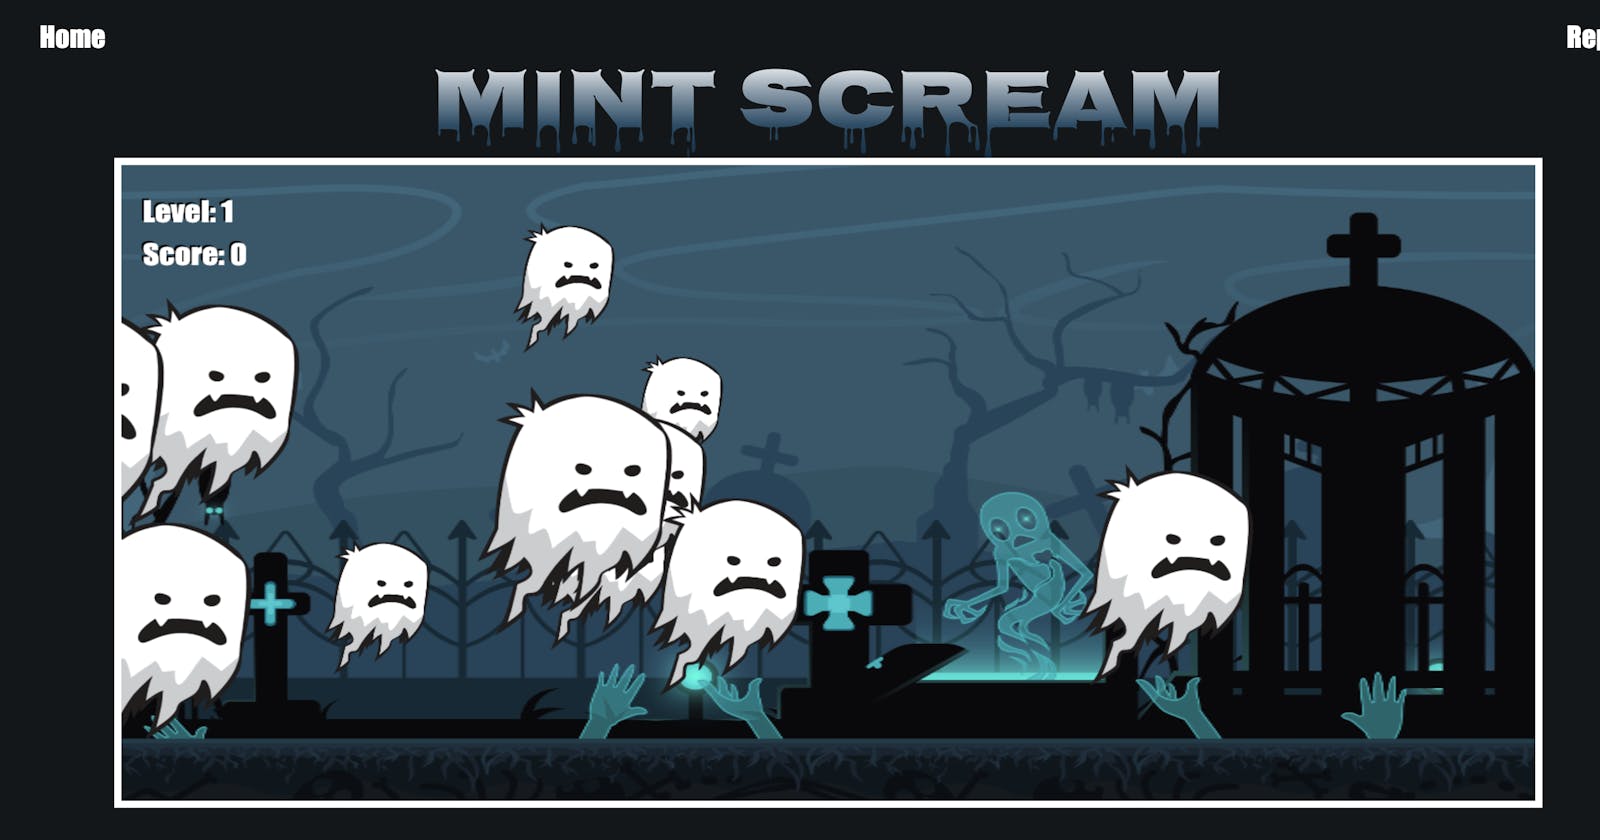
Mint Scream! Is our submission to the Mintbean.io Hackathon.
Deployed Game || View the Code
The Constraints:
The requirements for submission were as follows:
Game:
- Your game has to be 2D. Isometric view is OK as long as there are only 2 dimensions that your character can move in.
- Your game must have a clear win condition. For example, in some games, beating the boss monster.
- Your game must have a clear lose condition. For example, in some games, losing all your lives.
- Your game's frontend must be built in JavaScript or Typescript.
- You can only use packages that you can download off NPM, and you cannot use professional game engines like Unreal, Unity or Godot. (If in doubt, ask)
- Your application must have a clear landing page.
Landing Page:
- Description of your application
- Explain your project's features
- Include a short demo video
- Tutorial on how to use or interact with your application
- Obvious and clear button to link to your live application
- "Meet the Engineers" that shows a photo of you and your team plus links to your LinkedIn, Twitter, and Github
Our Choices:
After googling for ideas, we settled on HTML5 Canvas, CSS, and Vanilla Javascript. We didn't know about Phaser.js, or other libraries that included bells and whistles. And we'd never created a 2D scrolling game before.
So we baked up this game from scratch.
There were several tutorials, and at first, it seemed easy enough. I thought that it would be pretty smooth sailing to adjust the bones to our needs and add additions in CSS.
(yeah, reader, I can hear you laughing too!)
The Build
We had three layers per level, four levels total.
The main two layers were the Sprites and Parallax backgrounds. The third level was the most difficult - my partner worked for ages - impressively relentlessly - on getting clickable buttons to overlay the sprites.
Layer 1: Sprites
We found free 2d game assets online. When downloaded, they came as a folder with each frame separated into its own PNG file. To make the sprites move, we needed to convert the still images into sprite sheets. We also had to adjust their size and the direction they're facing.
The complexities of determining delta time, and using it to adjust the time between sprite sheet frames in order to get the ghost to wiggle, bat wings to flap, spider legs to move, and 'goblin' (as we called him) mouth and feet to move, while also moving across the screen via x and y coordinates in the way we wanted, was no small feat. Ghosts float, bats fly, spiders scurry.... each sprite's movement was customized.
We also added click events so that when you click on a sprite, they poof into a cloud of smoke and disappear, and wrote functions to determine the winning score and to move onto the next level.
(actual photo of me, at this moment)
Layer 2: Backgrounds
We started with a still background image, but after seeing the effect of the sprites moving across the screen, we decided that we couldn't stop here. We really needed to have a moving parallax background. We found free background images online, with the layers already separated. We built the custom parallax background using these sources, fitting them to our viewport and adjusting the speed which each layer moves. This was the part I worked on the most, and found it challenging to get the images to not look stretched out or cropped, and to move smoothly in either direction. So much math, positives and negatives, that seemed like they'd be easy to just swap, but then a layer would melt off the screen, or leave large gaps between frames.
Layer 3: Clickable Buttons
My partner worked on this part. Her goal was to get buttons to pop up in front of the sprites - "start game", "replay", "pause".
This turned out to be incredibly challenging, with limited documentation. She found so many possible solutions, and was SO close to getting it, so many times.
I am still, completely in awe of my partner's dedication to this problem. Her research abilities, coding skills, and ability to talk about their code and describe their challenges are out of this world.
Seriously. Whoever hires her scores a relentless and dedicated problem solver.
Personal Learning Challenge: Sharing
(Actual photo of our process at times)
When we began the project, my partner introduced me to the VSCode Live Share feature. I didn't totally understand how it worked - if I made a change to the code, could they see it? Does it save separately and resolve conflicts before saving? Would I break the whole thing? Sometimes, I wouldn't see a change, or they wouldn't see mine, or it would lag or drop and we'd lose precious focus and time restarting. I was scared of messing up.
My usual code editor is NOVA , and my usual browser is Brave. VSCode isn't new to me (love Quokka !), but the Live Sharing feature was. Learning how to use this, on top of everything needed to build the game was overwhelming at times. My eyes burned. And, it turned out, we were using different browsers as well and weren't always seeing the same things.
Result: WET
Since the VSCode Live Sharing felt overwhelming and we were on a time crunch, I tried to work around it by working on my parts in my local code editor. I figured it would be easy enough to work on something separately there, then to copy/paste or push to Github later. This kind of worked, for some things, but as the project grew it left us with more difficulty combining.
I should have taken a couple hours to get really comfortable in this before starting the project, but I was just so excited to begin and knew we were short on time. I thought I'd figure it out as we went along, but my lack of confidence here slowed us down more in the end.
Conclusion
I am so thankful to have worked on this project, to have gotten to know my partner a bit, and have learned more in the last week than I have in any other time in recent memory.